For some people it may be very easy but to others changing a flat tyre can be quite a daunting and stressful task. Flat tyres can happen anywhere and at anytime, in your driveway, on the side of a road, at night or even in the rain. Fortunately changing a flat tyre isn’t that difficult once you know how, just follow this guideline next time you get that dreaded flat tyre.
Be prepared
- Regularly check your tyre pressures are at the recommended inflation and that the tyre is in good condition. Follow your vehicle manufacturer’s recommended PSI or consult your local tyre centre. If under the recommended inflation the tyre has a higher change of sustaining a puncture from debris on the road.
- You should also be checking your spare tyre regularly. The last thing you want is an unusable spare tyre when you have a flat leaving you stranded on the side of the road.
- Make sure you have all the required equipment in your car boot to change a tyre. This includes wheel brace, jack, safety triangle and wheel chocks. It’s also a smart idea to have a torch, work gloves, towel and rain coat to cover all weather conditions.
How to change a tyre
1. FIND A SAFE AND LEVEL LOCATION
As soon as you realise you have a flat tyre, find the most level and firm ground available before attempting to change the tyre. Do not abruptly brake or turn while you have a flat tyre. Do not stop on a bend, a steep hill or where there is poor visibility. If it means driving a little further until you reach a safe location then do so, a tyre and rim can be replace but a life can’t.
2. TURN ON YOUR HAZARD LIGHTS
Hazard lights help let oncoming traffic know that you’re broken down. If it’s dark leave your parkers on. Turning your lights off creates a dangerous situation for both you and other drivers.
3. APPLY THE HAND BRAKE
Applying the hand brake will minimise the possibility of your vehicle moving while changing the tyre. Put your vehicle in park ( P ) or in gear for a manual transmission.
4. PLACE SAFETY TRIANGLE
Place safety triangle at least 5 metres from the rear of your vehicle if possible to further warn approaching vehicles.
5. REMOVE TOOLS AND SPARE TYRE FROM BOOT
Remove jack, wheel brace, wheel chocks and spare tyre from boot and place next to flat tyre. This prevents any unnecessary movement once the car is up on the jack.
6. APPLY WHEEL CHOCKS
This will further prevent the vehicle from rolling while changing the tyre. If changing a front tyre, place the wheel chocks behind the rear wheels. Similarly, if changing a rear tyre then place wheel chocks behind front wheels.
7. REMOVE WHEEL NUT COVERS OR HUBCAP
If you already have access to your wheel nuts then proceed to Step 8. If not, remove covers and or hubcap to allow access to remove the wheel nuts on the flat tyre.
8. LOOSEN THE WHEEL NUTS
Before lifting the vehicle with the jack, use the wheel brace on the wheel nuts and loosen them slightly, ¼ to ½ a turn at most. Do not completely remove wheel nuts just yet. Loosen wheel nuts by turning anti-clockwise, some force may need to be applied.
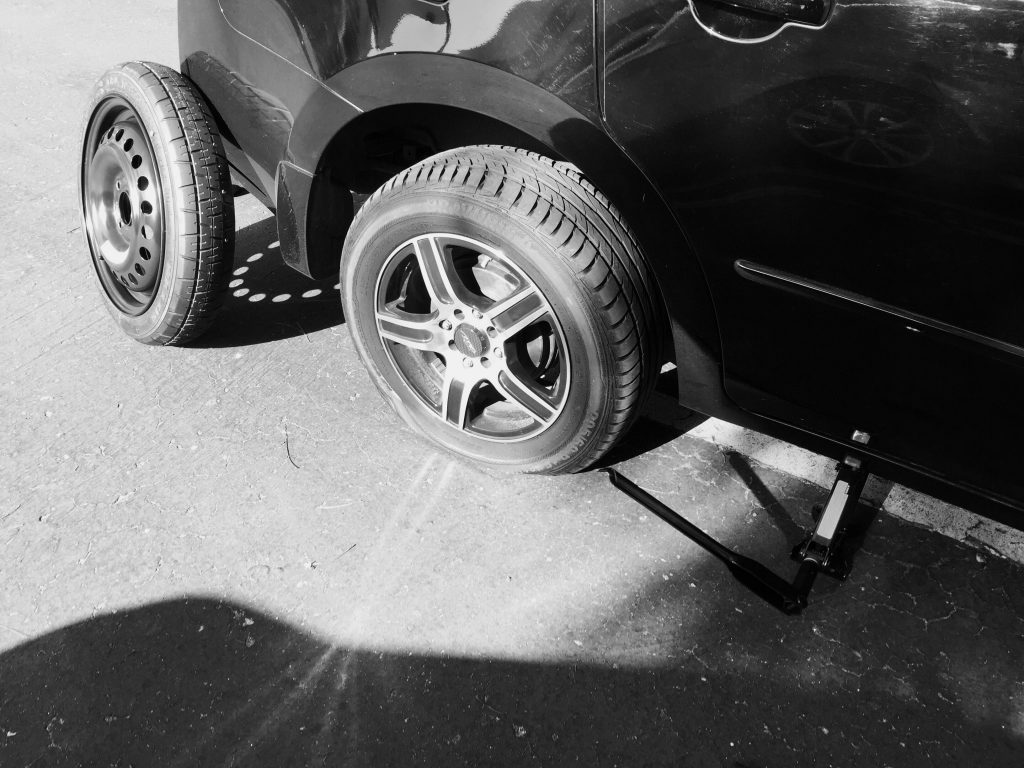
9. PLACE JACK UNDERNEATH THE VEHICLE
Vehicles come with different jacks and all vehicles have a specified jacking point, this also applies to caravans, boats and trailers. Jacking points can be found in your vehicles owner’s manual, be sure to familiarise yourself with these points before undertaking the task. Most vehicles frames have a moulded plastic underneath the doors with a clear area of exposed metal specifically for the jack’s placement. Place the jack at the closest jacking point to the flat tyre. Sliding the spare wheel partially under the vehicle near where the jack is placed will act as a backstop if the jack fails.
10. JACKING UP THE VEHICLE
Wind up the jack until it reaches the bottom of the vehicle, ensure that it is in the right location and secure. Continue to jack the vehicle up until the flat tyre is at least 10cm off the ground. Never under any circumstance place yourself or any part of your body underneath the vehicle while it is hoisted by the jack. If a stand is available place it underneath the vehicle now.
11. REMOVE THE WHEEL NUTS
Now that the flat tyre is clear of the ground you can remove the wheel nuts all the way now. Since you’ve followed Step 8, the wheel nuts should unscrew easily with the wheel brace or by hand. Place the nuts in a secure location, preferably out of the dirt.
12. REMOVING THE FLAT TYRE
Place your hands on either side of the tyre and gently pull it towards you until the tyre is finally clear of the vehicle. Take the flat tyre to the back of the vehicle and place it on the ground so as to not confuse it with the spare tyre and to prevent it from rolling away.
13. PLACE THE SPARE TYRE ON THE WHEEL STUDS
Place the spare tyre on the vehicle by lining up the wheel studs with the rim. Once all wheel studs are aligned with the rim, gently push the tyre on until all wheel studs are through the rim.
14. SECURE THE SPARE TYRE WITH THE WHEEL NUTS BY HAND
Now that the new tyre is located on the wheel studs you can screw the wheel nuts on by hand clockwise. It’s a good idea to start with the wheel stud at the top. This will help secure the tyre in place while you put the rest of the wheel nuts on. All wheel nuts can now be tighten until they are finger tight.
15. TENSION WHEEL NUTS
Using the wheel brace now tension all wheel nuts clockwise in a criss-cross pattern. The wheel nuts do not need to be completely tensioned at this point, the wheel just needs to be in the correct position before lowering the jack.
16. LOWER THE JACK AND VEHICLE COMPLETELY TO THE GROUND
Remove stand if one has been placed under the vehicle in Step 10. Lower the jack now until the vehicle is on the ground and then remove the jack.
17. FULLY TENSION WHEEL NUTS
Now that the vehicle is back on the ground you can get the correct tension on the wheel nuts. Fully tension wheel nuts with the wheel brace, again this is done in a criss-cross pattern until all wheel nuts have been tensioned as tight as you can. If unsure of correct tension, see your local tyre centre for correct tension.
18. REPLACE WHEEL NUT COVERS OR HUBCAP
Replace the wheel covers that you removed in Step 7. If they don’t fit, then store them in the boot until the flat tyre is repaired.
19. SECURE ALL TOOLS AND FLAT TYRE BACK INTO BOOT
Don’t forget to secure all tools and flat tyre in your boot before you drive away. This includes your jack, wheel brace, safety triangle, wheel chocks and flat tyre
20. CHECK TYRE PRESSURE IN THE SPARE TYRE
If you have a pressure gauge in your vehicle check the tyre pressure before driving off. Alternatively drive to the closest service/petrol station to see if the pressure in the spare tyre is at the correct pressure. If not inflate to the correct pressure.
21. GET YOUR FLAT TYRE REPLACED
Book in with your local tyre centre and have the flat tyre replaced as soon as possible. You do not want to be driving around without a spare tyre. Some vehicles come with space savers or temporary tyres which are much smaller and narrower than the normal tyres on your vehicle. They are not made for long distance or driven at speeds over 80km/h and should be replace with the repaired tyre as soon as possible.
Knowing how to change a tyre is a great skill to have in life, but regular tyre maintenance is very important and can prevent some punctures. If you’re uncomfortable or not confident with jacking the vehicle, handling the spare tyre or tensioning the wheel nuts. Call us at QUICKTOW for help and we can get you and your vehicle to a safe location. Whether its your home or the tyre centre QUICKTOW has got you covered. For more guides like this check out 5 Steps for driving in bad weather, 6 Tips to trailer reversing and 7 Safety tips when your vehicle’s broken down.
Related Posts

What to do when EMERGENCY vehicles approach
Following this easy guide you will know what to do next time you encounter an emergency vehicle with its lights and siren on.